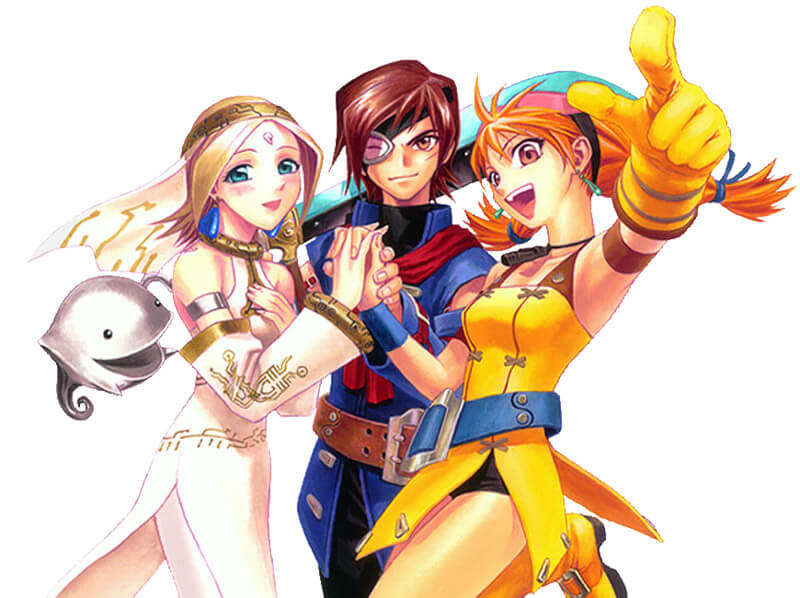
Aika
Skies of Arcadia
Skies of Arcadia

Skies of Arcadia is my favourite game and this was a huge project for me. I made Aika as my costume for the finals of European Cosplay Gathering when I represented the UK as the Solo Act in Season 7!
When I qualified, I was determined to do something I really wanted to do for the finals – I narrowed down 5 costumes to choose from, and Aika came out on top! It was wonderful to represent not only the UK, but also one of my favourite characters on the amazing stage at Japan Expo.
The design might look simple, but this was one of the toughest costumes I’ve made. So many new techniques to learn and a lot of pressure! If you are interested in how this costume was made, please read the Construction Notes below!
Materials Used:


Construction Notes:
These notes are going to be lengthy, so strap in! I’ve tried to cover as much as possible, but if you do have any questions or if something isn’t addressed here, please feel free to ask.
Aika was a steep learning curve for me. Probably a bit silly to choose a costume with so many new, unfamiliar techniques for a competition final, but that’s how I like to do things! Competing is a great way to push my own boundaries and have an excuse to try new things, and Aika was no exception.
There aren’t that many Skies of Arcadia cosplayers around, and when preparing to make Aika I think I looked at every single one on the internet while trying to suss how to make my own costume. I remember back in 2006 I saw WoggyWooWoo’s Aika and I was absolutely amazed by her wig – it’s kind of funny how things turn out, and that over 10 years later I was still using hers for inspiration to finally make my own!
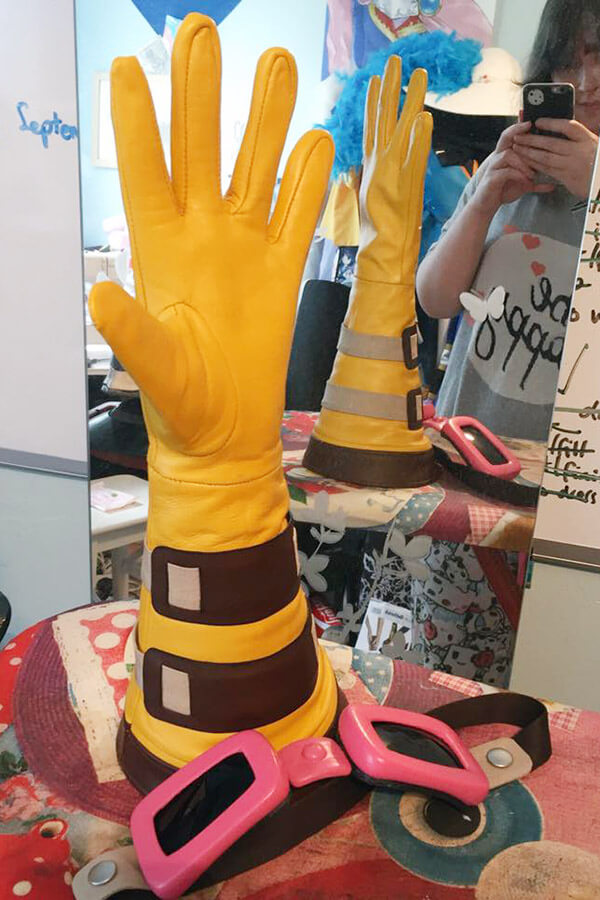
I took a lot of things into consideration with Aika: because the source material is so old it was difficult to choose appropriate materials and to figure out what detailing would be if the costume was in “real life”. One of the Japanese guidebooks refers to her glove and boots as being made from leather, so that was the main material I chose to keep it accurate. I used various types of leather bought from Le Prevo Leathers.
There are lots of pictures to the side in the Construction Gallery showing how it was made, too!
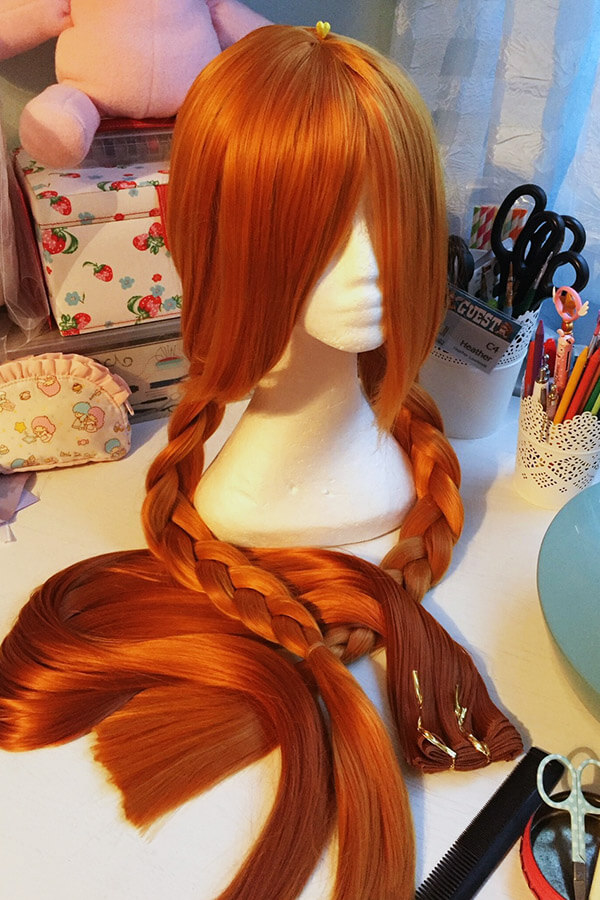
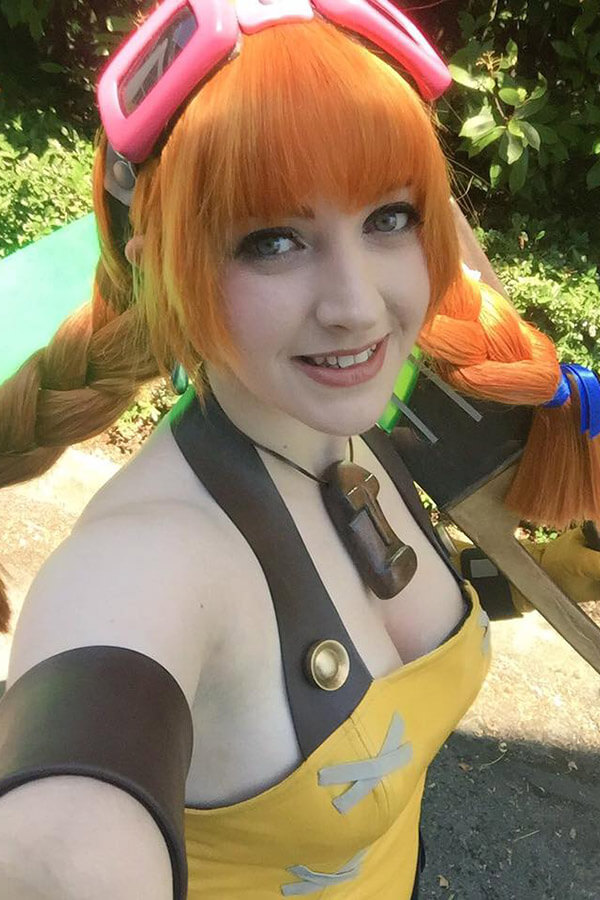
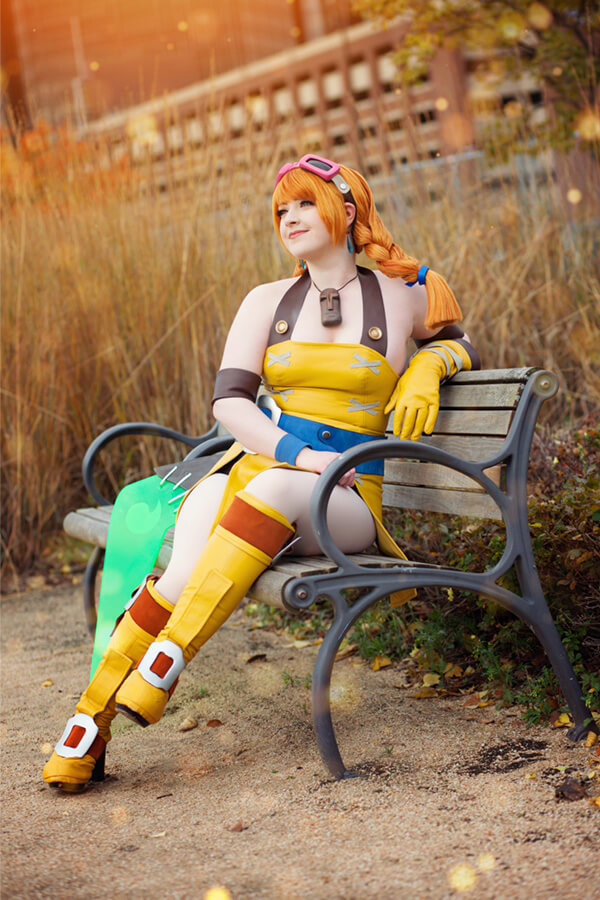
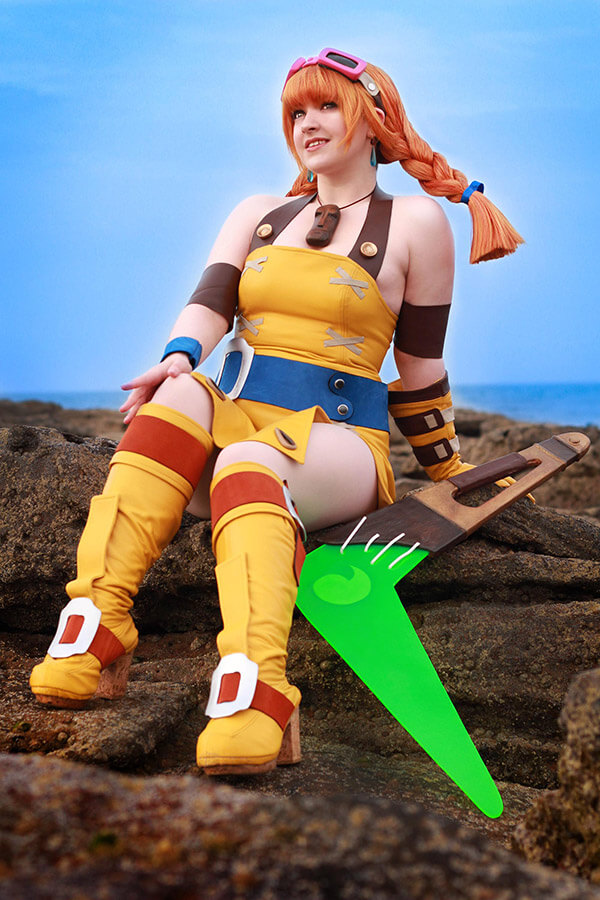
The wig was the biggest task of the whole costume. A big, stylised hairstyle like Aika’s is “make or break”, so I started by getting the wig materials first and took my time putting everything together. I used a Leia in Light Copper Red & Wefts in Pumpkin from Arda Wigs.
The wig arrived pre-styled with a back parting and thick braids. Not thick enough, though! The inside of the wig was bulked with extra wefts and then fitted with a wire and felt structure that the braids are built upon.
There is wire secured inside the wig cap which comes in and out of the wig in 6 places as long cones, for the positions of the braids. These cones are fitted and sewn inside felt covers which are sewn to the wig, then covered in loose wefts and hair from the wig with Got2B Glued Spiking Gel and Hairspray. Once these pieces were covered with hair, it was time to braid each side. I had a lot of assistance with this from my sister – because of the wire structure inside, it had to be braided on my own head to ensure it would fit correctly!
It was tricky to bend it into a new shape without the hair shifting or adjusting too much. Each section that was braided down was secured with hair gel using water and a paintbrush to secure the fibres. Each side took roughly 6 hours to braid and set. The blue ribbon ties are starched to keep their shape and glued into place.
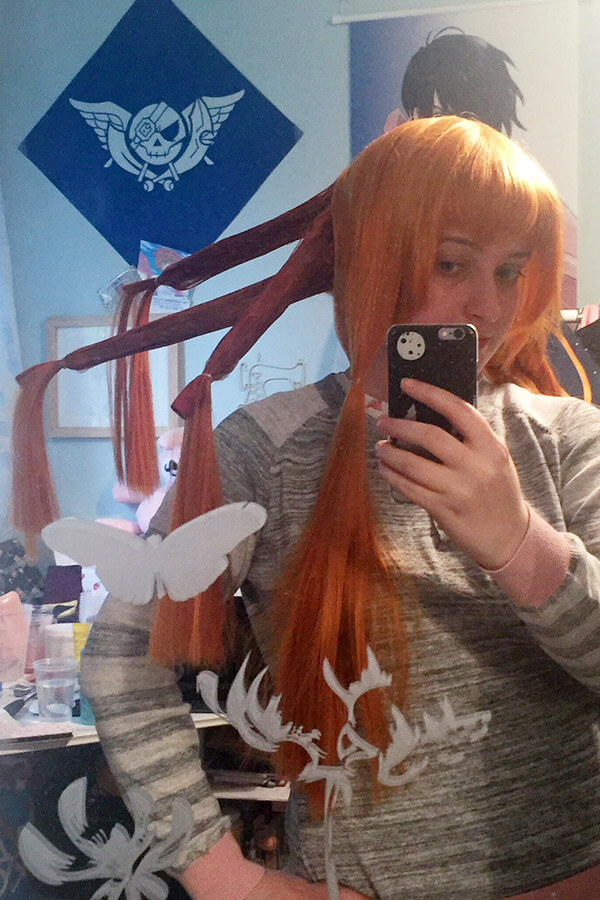
The goggles are attached to the wig to make a complete hairpiece. They are secured with snap fasteners on the strap which fix to the netting of the wig so they can be removed if needed. The strap is made from canvas and scuba jersey. The strap is glued inside the goggles between the plastic and the foam insert.
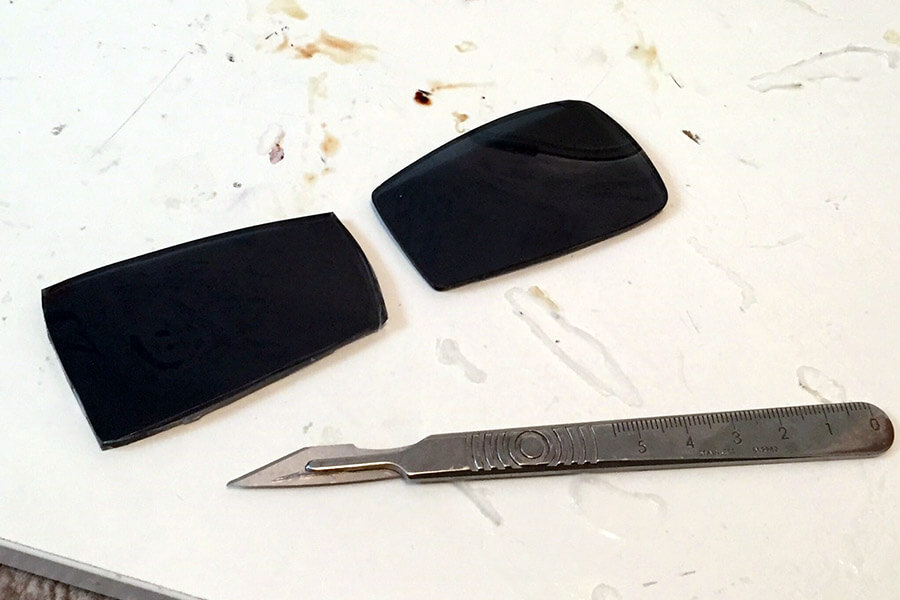
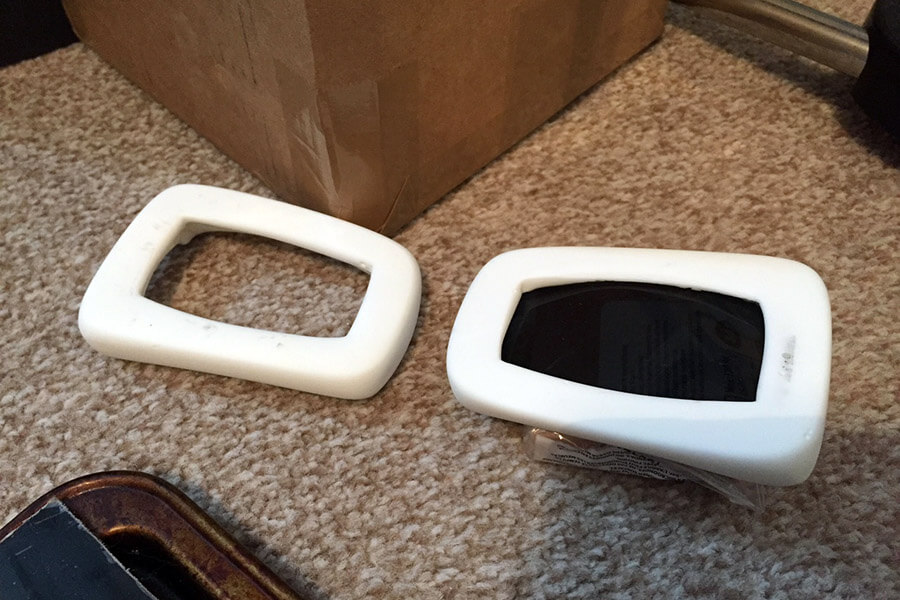
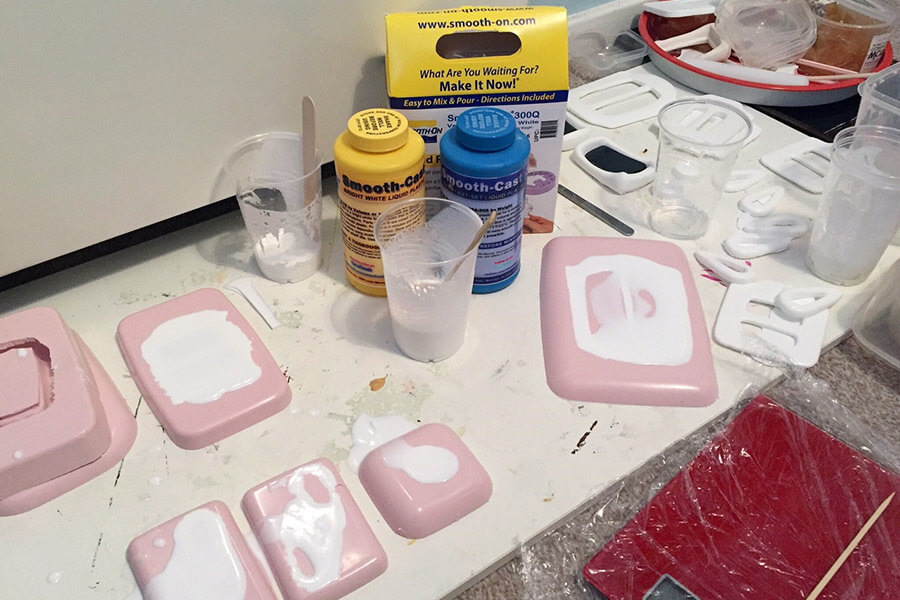
The plastic goggles were originally made from Sculpey Light. The shape is identical, flipped 180° for each side. Once the shape was “correct” it was sanded and filled to even out the shape then cast in silicone and Smooth-Cast 300Q. Once both pieces were cast, they were sanded, primed and spray painted. The smaller panel between the goggles is made from Sculpey Light instead of plastic to retain flexibility on my head, and attaches to each side of the goggles with two small nails.
The black “glass” in each goggle is made from 3mm perspex, heated and cut by hand, sanded and glued inside. The base is finished with a 5mm piece of Cosfoam (from Coscraft), heated, sanded and glued in place.
The earrings are made from blue teardrop beads bought from YummyTreasures on Etsy (the same ones I used for Sumomo). I attached them to beads and findings sourced locally from VJW Jewellery. I don’t have my ears pierced so I used ear screws for a secure and comfortable fit.
The necklace is made from hand carved balsa wood. This was my first attempt at wood carving! I used balsa wood because it’s light, cheap, easy to dye and easy to sand. There is a hole through the top with leather thonging for the strap. I started off by roughly drawing Destra onto the wood, chipping and carving away, then refining the shape with sandpaper before using wood stain and varnish to finish.
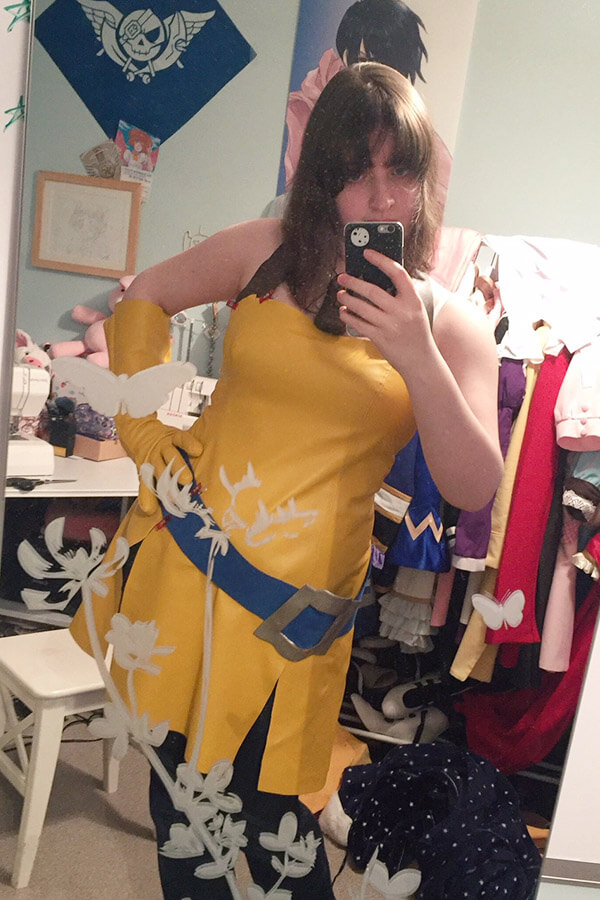
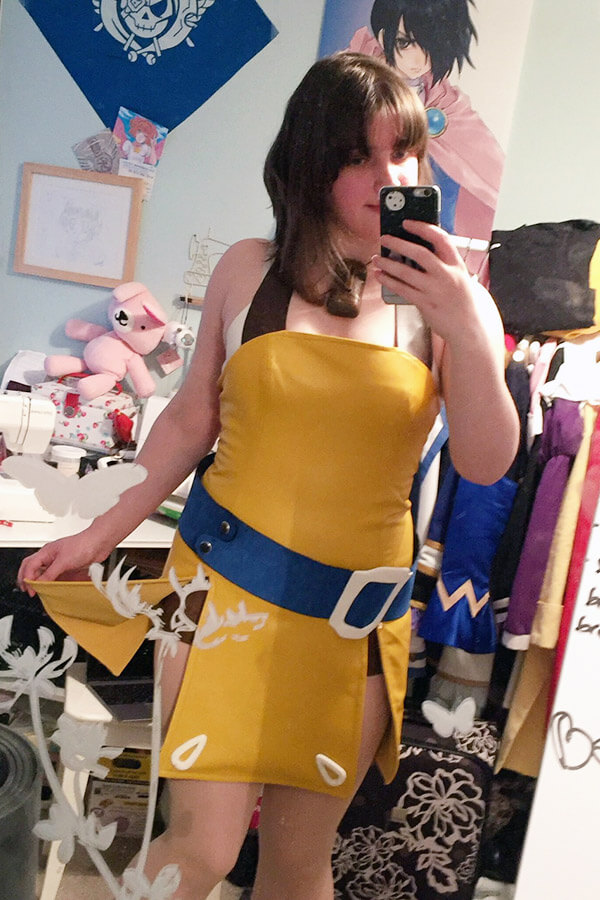
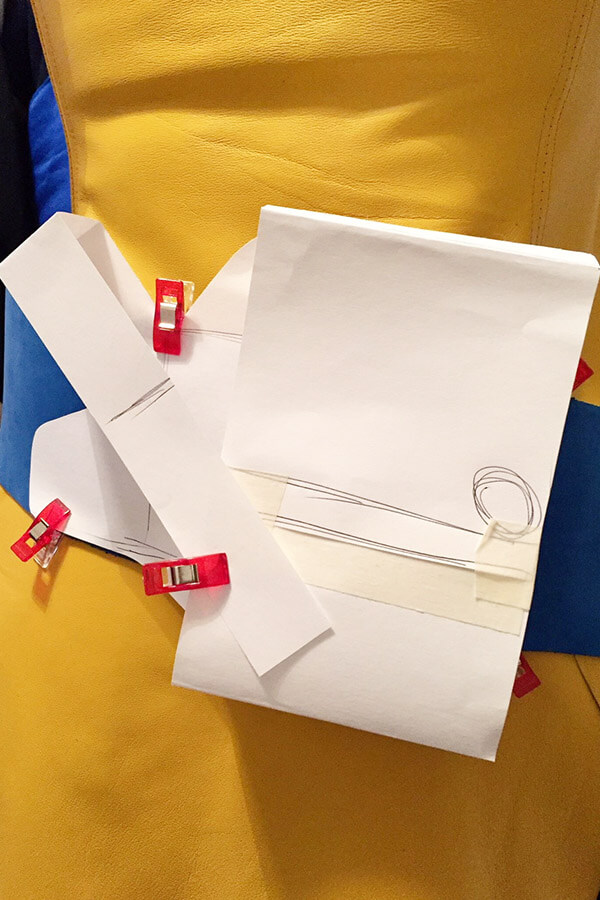
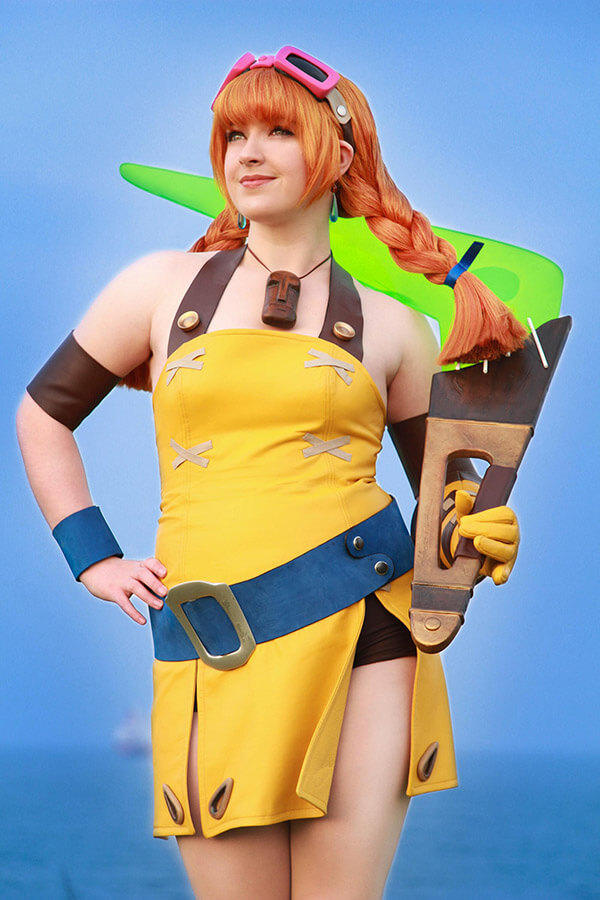
The dress was patterned from scratch and refined as 4 separate versions before cutting it out of the leather. There are 4 sections: front, left side, right side & back. My shoulders are uneven so I patterned each piece as it’s worn so the hem would sit correctly. It was patterned to emphasise the bust, pull in at the waist and flare out over the hips.
The dress is made from nappa leather which was thin enough to be sewn by my machine. I used three large hides to make the yellow dress, boots and glove. The brown halter strap is also made from nappa leather which was left over from making Totori. The dress is fully lined with stretch crepe. I decided to use crepe as it would be able to stretch with the leather as it pulls naturally, without affecting the way the dress hangs or wears.
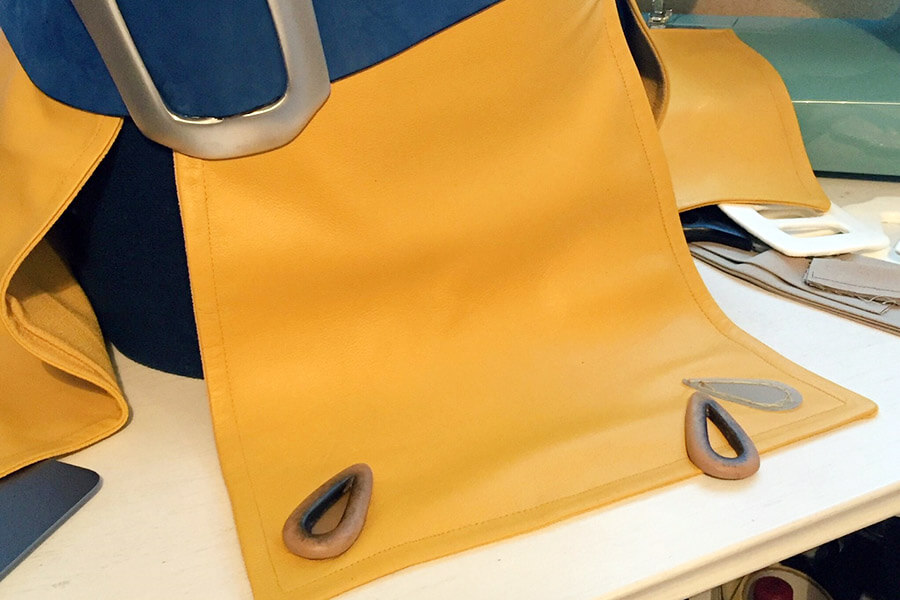
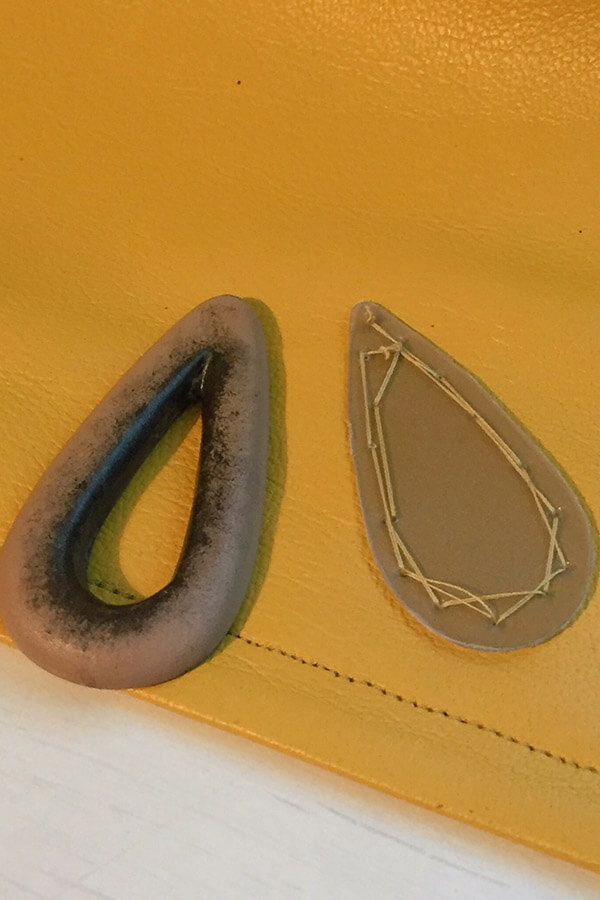
The decorations on the dress were attached by hand. The small crosses down the front are made from canvas which was handsewn into place. The buttons on the halter strap and the decorations around the bottom of the skirt were sculpted the same way as the goggles, using Sculpey Light & Smooth-Cast 300Q before being sanded, primed and painted. Each decoration is glued to a small piece of plastic which is sewn to the dress, so they can be removed if necessary.
Underneath the dress there is a bodysuit made from brown scuba jersey, dyed with iDye Poly to match the leather. She wears shorts, but constructing a bodysuit made it easier to hide bulky seams and my underwear. The bodysuit was patterned to match the cut of the dress, with a slanted seam across the waist to follow the belt’s curve.
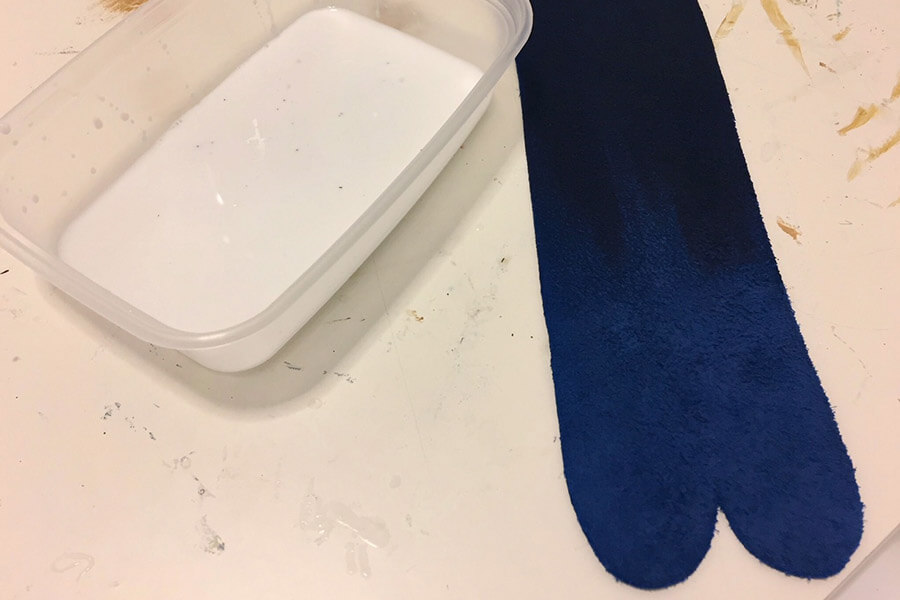
The belt is made from thick blue buck leather. I chose buck leather because of the softer texture for contrast against the sheen of the yellow dress. The belt is patterned with a slight curve and closes at the front with snap fasteners. The back has a decorative holster to match the references, stiffened with PVA glue. The buckle was also made using Sculpey Light & Smooth-Cast 300Q, cast as a flat panel and then bent gently with heat and finished with spray paint.
The glove was made from the same nappa leather as the dress. I made the glove twice – the original one was oversized to match the references, but it was very difficult to hold anything or move my hands (which I needed for my performance), so I remade it as a much cleaner, close fitted glove. The straps on the glove are made from brown nappa leather and canvas and it is fully lined with stretch crepe.
The armbands are made from nappa leather lined with brown jersey so they don’t slip when worn. The wrist cuff is made from blue jersey that matches the belt.
The boots were made with an original pattern attached to a pair of bought sandals. Due to the age of the game there are very few seams drawn, so the boots had to be patterned in the most efficient, “seam free” way possible while maintaining the shape. There is a seam down the front and back – the front is hidden by the tongue and the back closes with a zipper. The front of the boots are stuffed to create the “square toe”. A thin strip of leather was sewn to the bottom edge and glued to the sandal for a clean finish.
The straps on the boots are made from a thick orange suede. There are large silver buckles on each strap. The originals were made using worbla, sealed with glue and sanded before being cast using Smooth-Cast 300Q, then sanded and spray painted.
The boomerang is made from a sheet of 5mm Apple Green perspex and 5mm Cosfoam (from Coscraft). The perspex was heated and cut by hand, drilled, sanded and detailed with a frosted glass spray. It slots into the handle and closes with decorative “staples” made from thin strips of polypropylene, glued into place on either side of the handle. The blade and handle can be separated to make it easier to transport.
The handle is made from three layers of 5mm foam. I covered the foam with worbla for extra stability. The worbla was primed with glue which was textured with sandpaper and a knife for a wooden effect in places, and holes were cut into the glue as battle damage. The handle is enforced with a piece of brown nappa leather matching the costume.
Throughout making this costume I had a lot of mishaps – almost every piece was made twice, some parts up to 4 times, and I spent a lot of time patterning pieces. The most stressful issues came from the silicone & plastic casting – I ended up having to cast everything twice because I had problems with the original silicone batch, and I made a lot of rookie mistakes while experimenting with pieces. It was an expensive set of mistakes, but it meant that when I got new supplies I knew exactly what not to do. Live and learn!
While considering materials, I did look into using faux leather for this costume – finding real leather in yellow is hard, but finding a decent faux leather was even tougher. I did find some that could have worked but the cost of the faux leather and import fees made it more expensive than the leather I sourced locally; it was also a heavy synthetic with a limited shelf life, which meant the costume would eventually degrade.
Overall, there are parts of this costume I would like to improve, but it’s a costume I’m very proud of.